the difficult first layer
In FDM 3D printing, the first layer of filament is both the most important and the hardest one to get right. Some say that the perfect first layer is beyond the capabilities of mere mortals. It sometimes certainly feels like it.
Most imperfections get hidden under the hundreds of layers that sit above them, but sometimes you want to print a model that's very, very thin. So thin that one part of it is only one layer thick. In this case it was the windows for a Minecraft lantern, which have to be as thin as possible to allow light through.
I have a Bambu Lab A1. The great thing about Bambu Lab printers is that despite running for over 1000 hours, I've had to do very little maintenance aside from the occasional axis lubrication and consumable part replacement. They really are amazing machines, which is why it took me so long to realise something was wrong.
The problem with an issue that manifests itself slowly is that you don't notice it happening, and a year later you wonder if the first layer of your prints always looked this bad.
Behold.
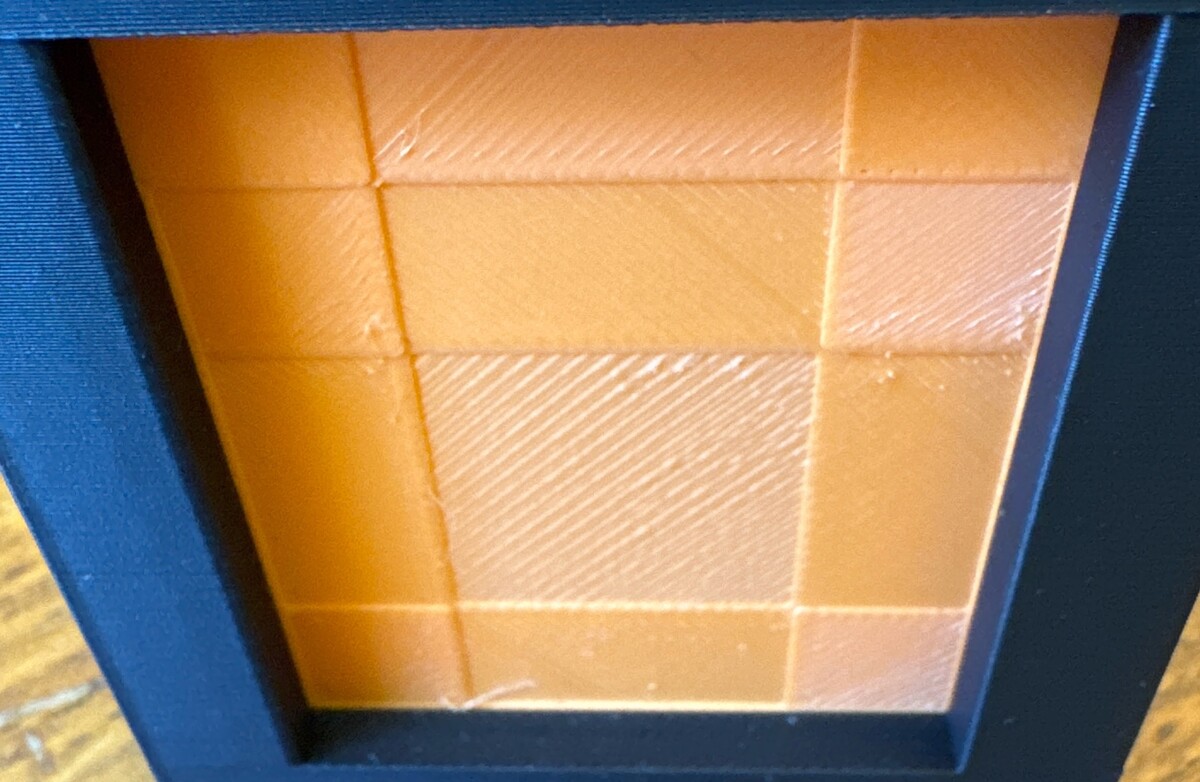
To my eyes that looked like over-extrusion. I tried all the obvious things, like ensuring the bed was clean, running the built-in calibration, and even replacing the hotend, which was due a replacement anyway, to no avail. Then I stumbled upon a page specifically for first-layer issues.
It suggested to take apart the panel behind the hotend and ensure the screws behind it were tight, as this could cause the hotend to be slightly loose. As you might expect, looseness and sub-millimetre precision don't go very well together.
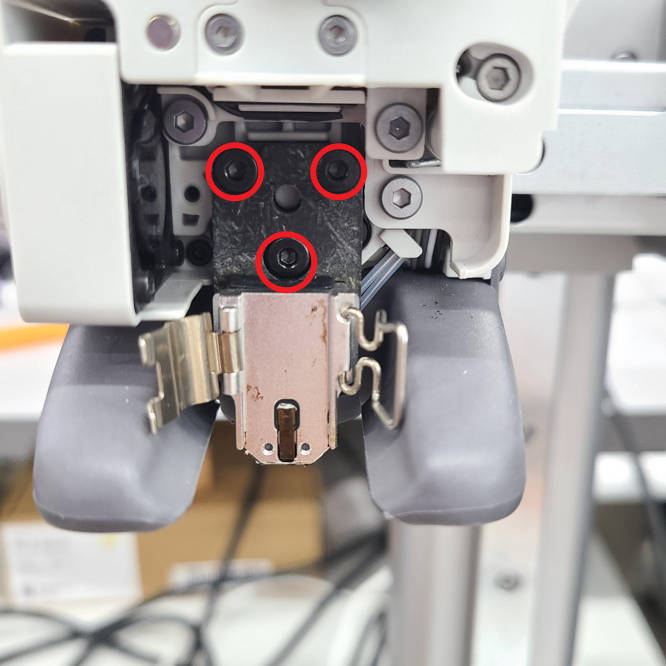
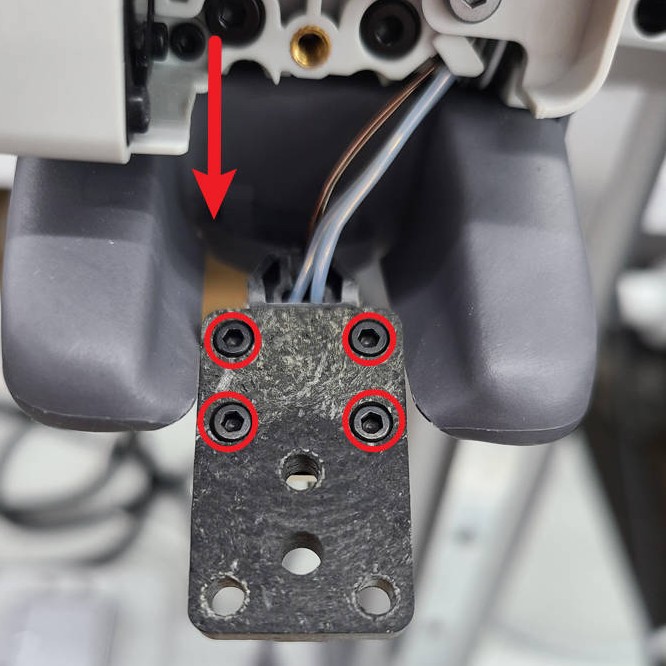
They were loose. I have no idea how gradually they loosened, but checking if they need tightening is not one of the recommended regular maintenance steps for this printer, which feels like an oversight. After tightening them up good and proper, I tried printing the windows again, and it was a beautiful sight.
A side-by-side comparison shows the difference.
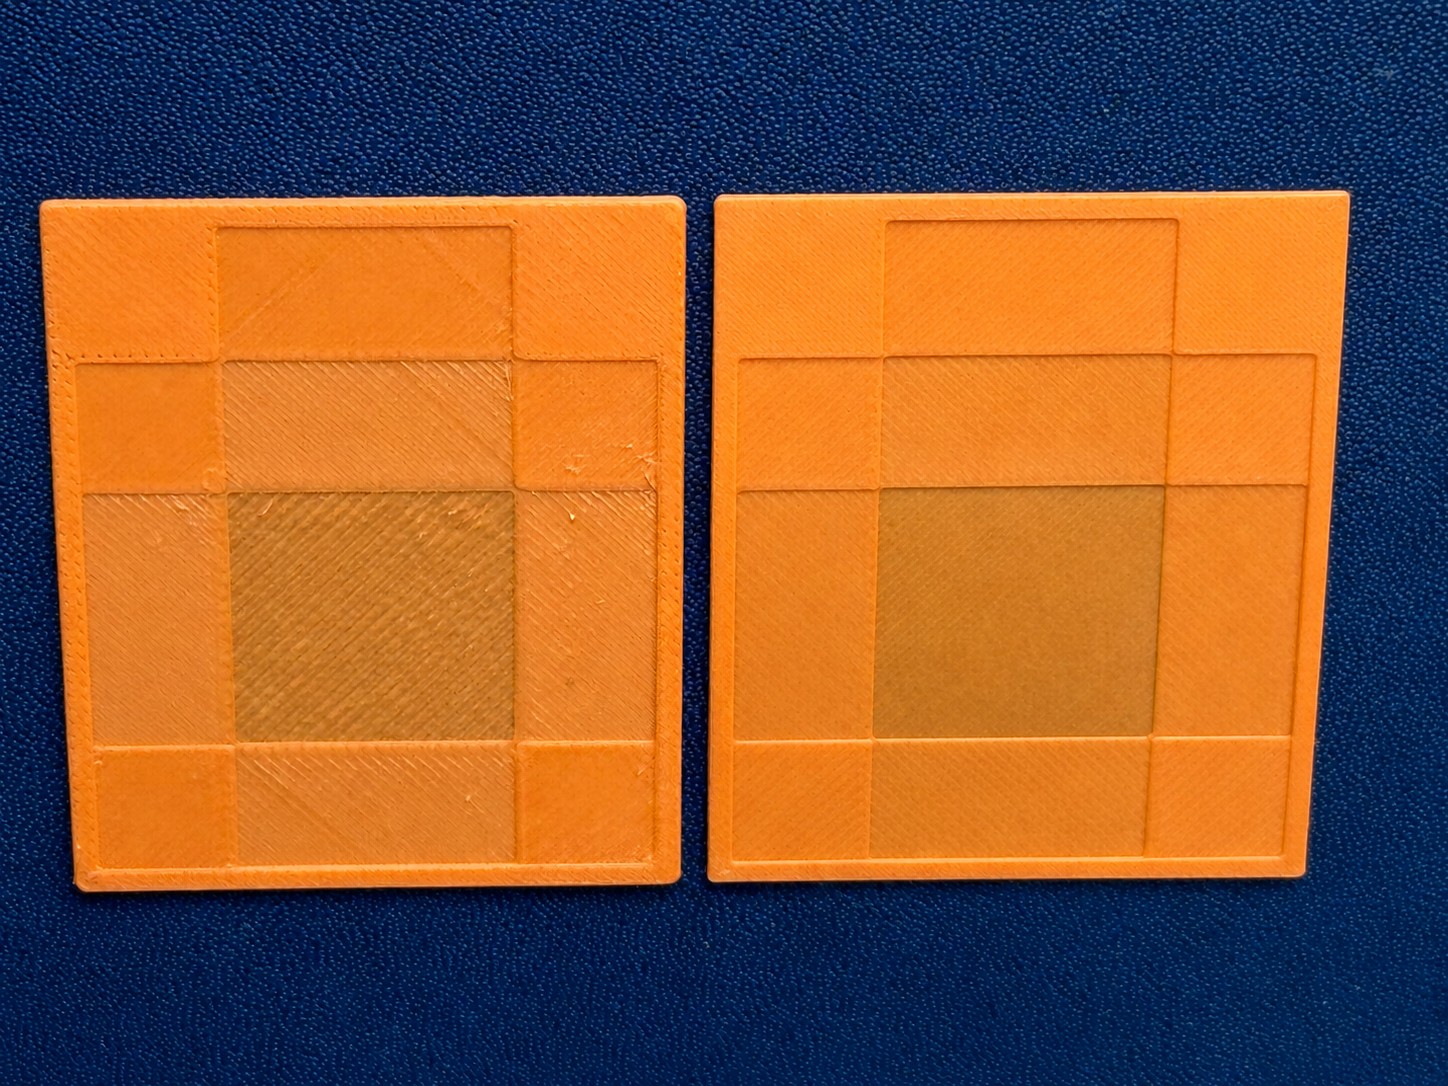
Problem solved, I thought. Not quite.
When I tried the same print on another type of build plate, I noticed the same issues occurring again, though much less. This time it was due to the initial layer flow ratio, which is how much filament is extruded from the hotend for the first layer.
I use two types of build plate: Textured PEI and Smooth (Supertack). Due to the texture, the windows print perfectly on the textured plate using the default flow ratio, but not the smooth plate. Since it's over-extrusion that we're dealing with, the tiny valleys in the textured plate absorb any excess filament, whereas on the smooth plate there's nowhere for them to go but up into visible peaks and ridges.
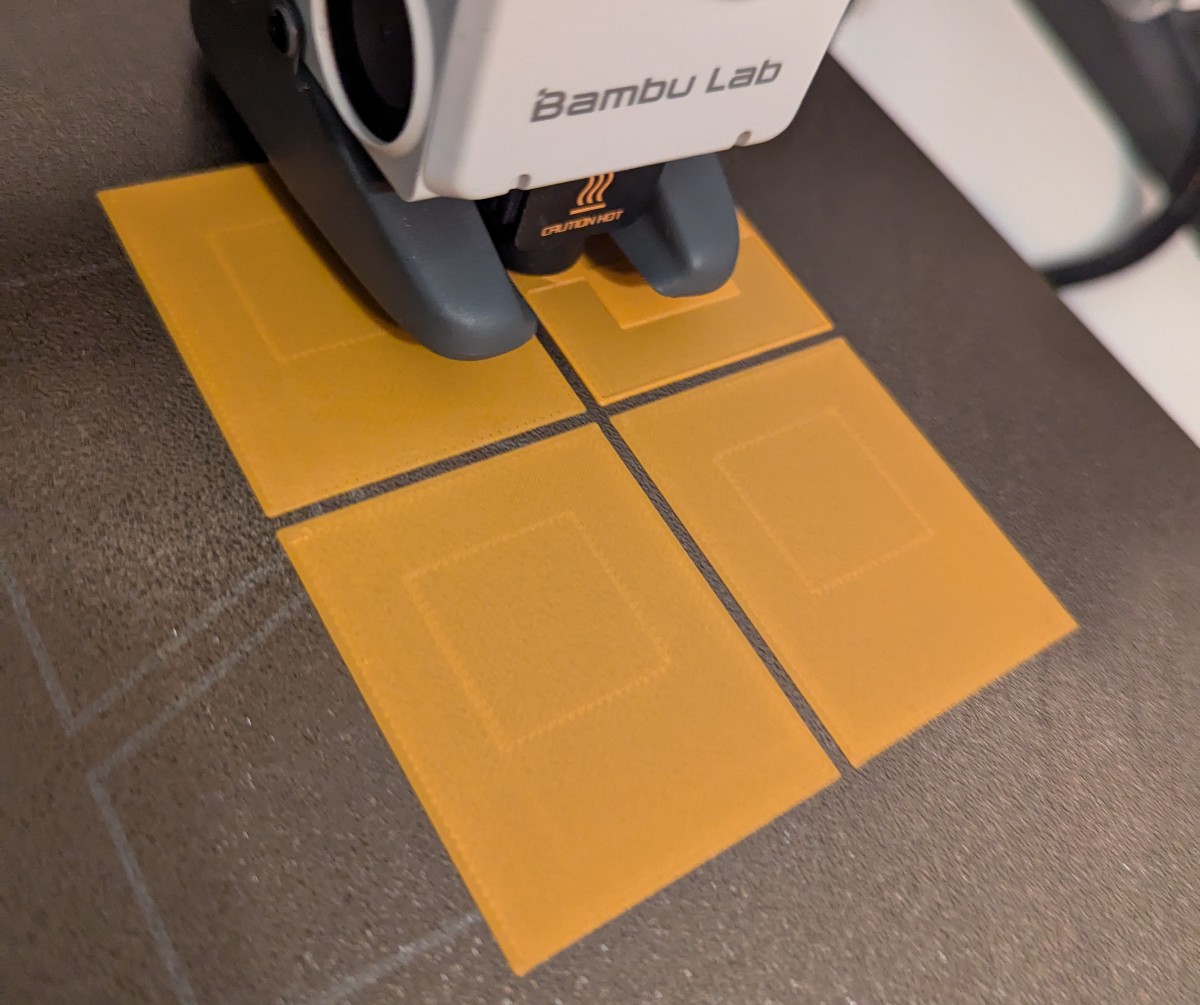
There are prints designed to calibrate the flow ratio for filament and plate combinations. I thought it would be worth comparing the results for both plates with the same filament.
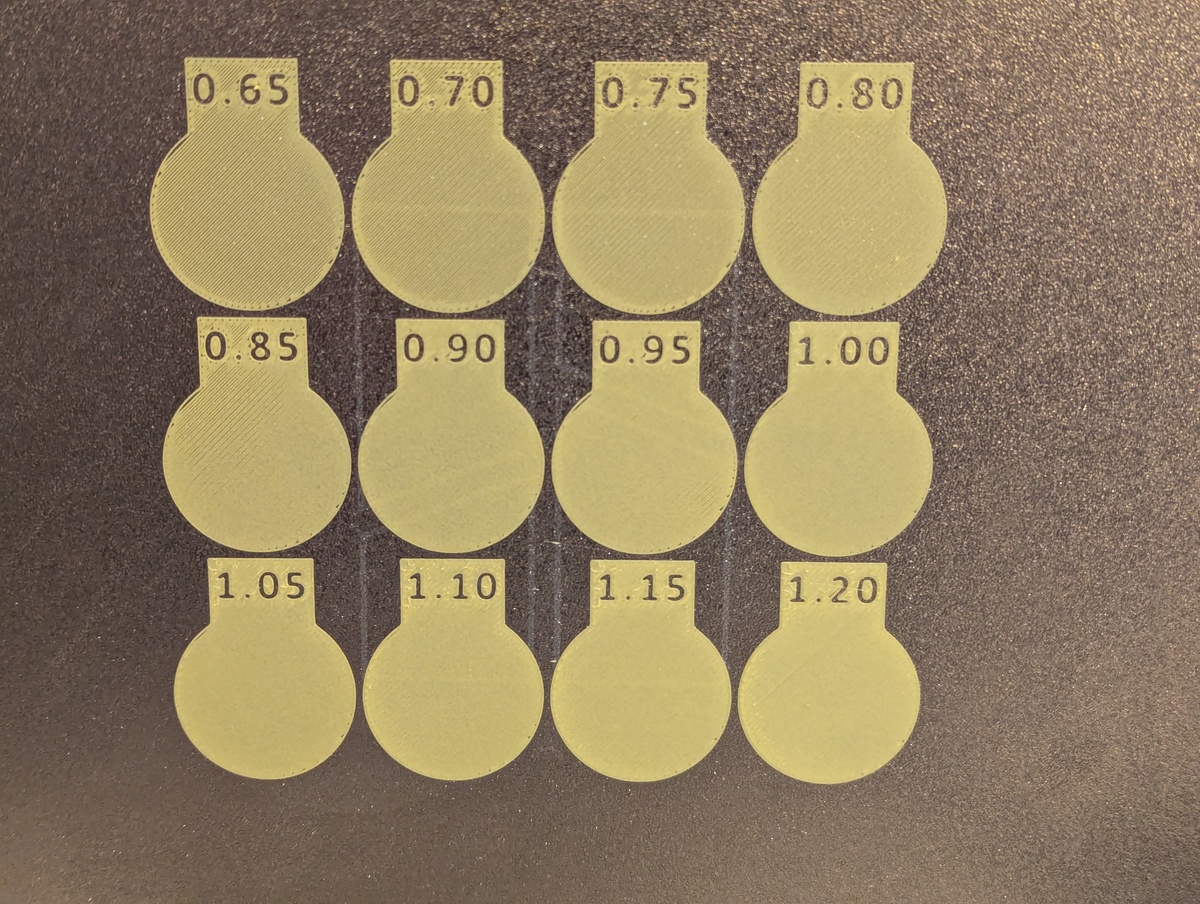
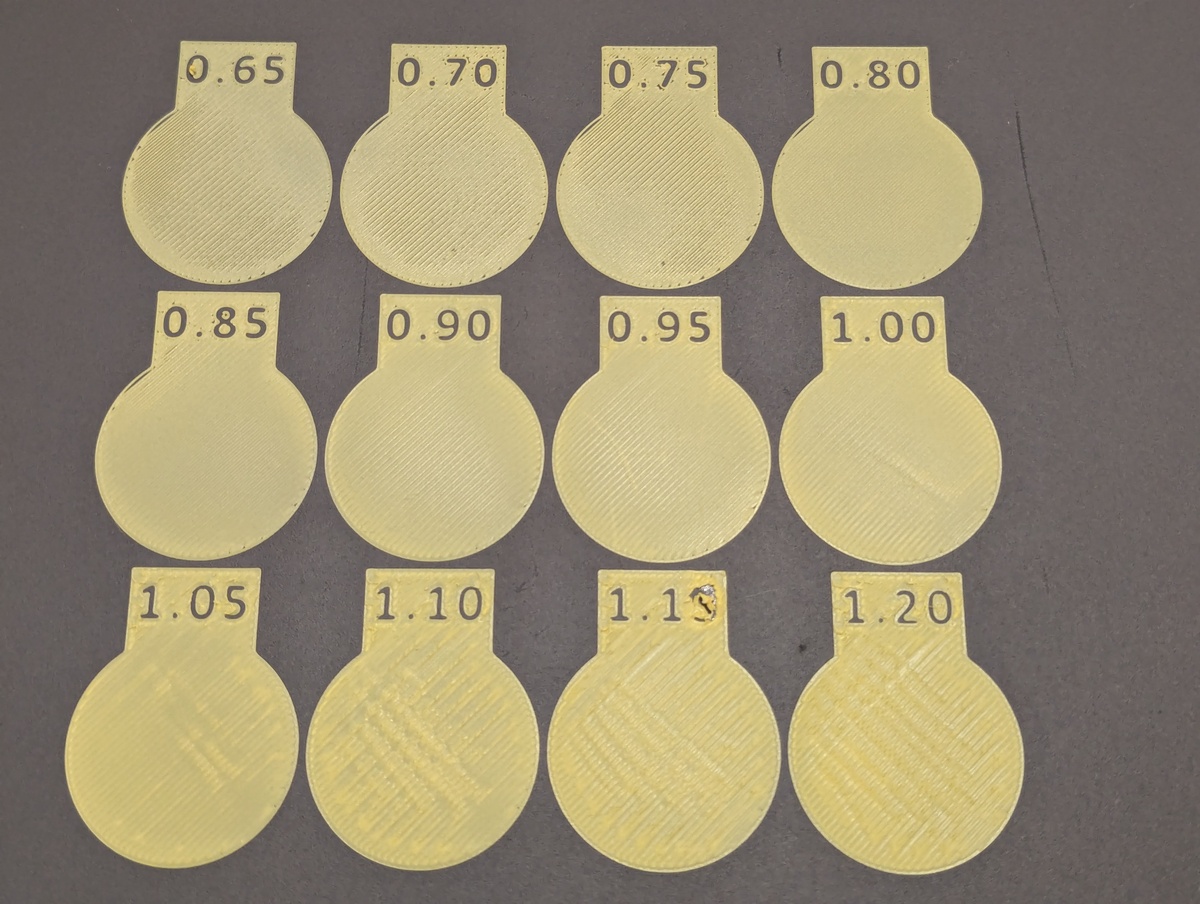
The textured plate looks pretty good at the default flow ratio of 1, but for the smooth plate it's clearly extruding too much. The best initial flow ratio appears to be 0.8 for this plate and filament combination.
In Bambu Studio the initial layer flow ratio is hidden behind developer mode, for some reason. To enable it, go to Preferences and enable "Develop Mode" [sic], then set the initial layer flow ratio under Quality → Advanced → Initial layer flow ratio.
This change allowed me to print the windows perfectly on the smooth plate as well.1
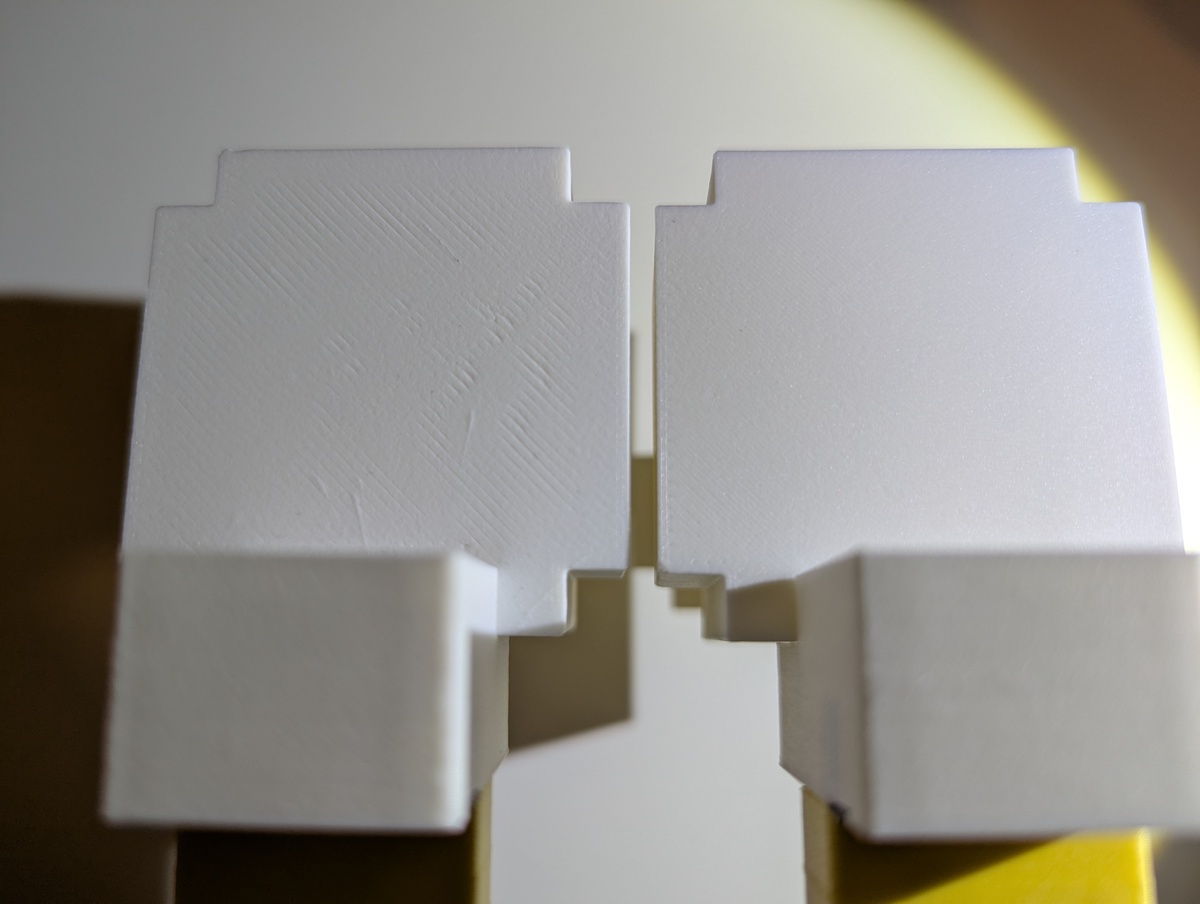
For a final test, I found another print where the bottom layer is the top of the model, so a smoother bottom layer means a better quality end result. After adjusting the ratio and reprinting it, the difference was subtle but significant.
Unfortunately setting the ratio to 0.8 for all prints with the smooth plate is not a silver bullet, as it also depends on the filament. I've since had several prints where 0.8 caused under extrusion for the bottom layer, so it would have been better to just stick with the default.
Running the calibration test for every filament and plate combination isn't practical, but at least now you know how to debug issues when the quality really matters.
-
Printing the calibration on both plates wasn't strictly necessary to fix the windows, but understanding the why is important to me. ↩︎